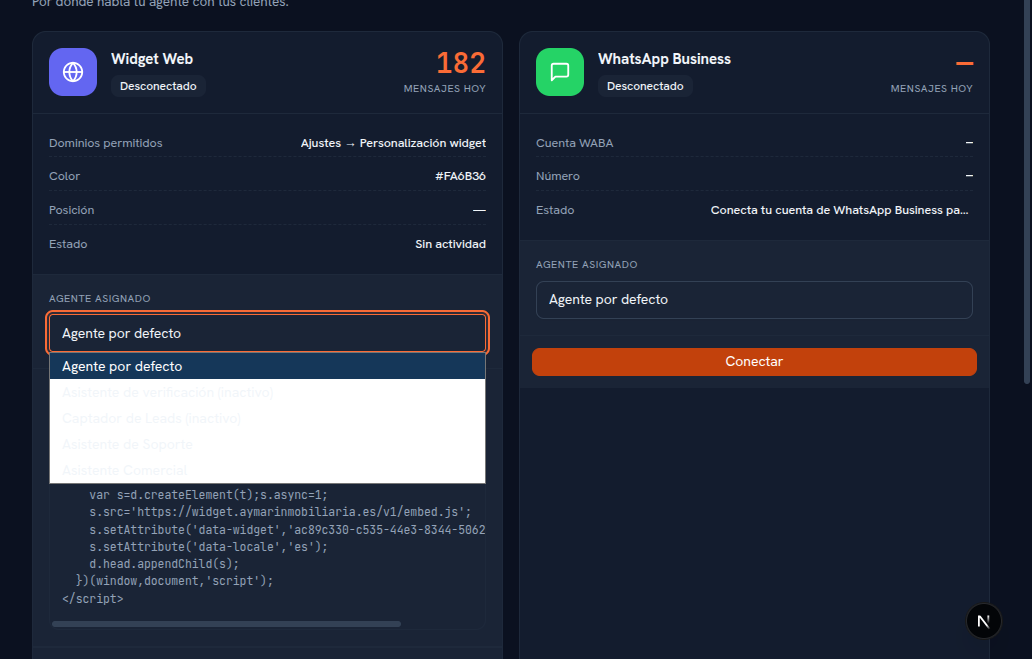
Every instance — every card — has its own Assigned agent selector, with your agency’s agent catalog (on Web Widget, WhatsApp, Telegram and Messenger/Instagram; not on Voice, which isn’t operating yet).
Requirements: administrator role; at least one AI agent created (Manual 23 · AI agents).
- On the channel’s card, open the Assigned agent dropdown.
- Choose the agent you want handling that instance.
Result: the selection saves instantly — there’s no separate “Save” button for this field. From that moment on, new conversations on that instance are handled by the chosen agent.
| Option | What it means |
|---|---|
| Default agent (initial option) | That instance’s conversations are handled by the tenant’s agent marked Active by default (or none, if there’s no active agent). |
| Rest of the agents | Your agency’s agent catalog. Ones that are Paused show up labeled “(inactive)” — you can choose them, but while they stay paused the instance will still fall back to the default agent. |
Note — A different agent per instance
You can assign the same agent to several instances at once, or a different one per instance — for example, a more casual-toned agent for Sales’ WhatsApp and a more formal one for Support’s. You can also mix different channel types: one for the widget and another for WhatsApp.