A campaign sends an approved template, with its variables already filled in, to a list or a selection of contacts — all at once.
Requirements: administrator or editor role; at least one template in Approved status (if you don’t have any, the wizard tells you and sends you to create one, section 9); available usage under the monthly limit (section 10).
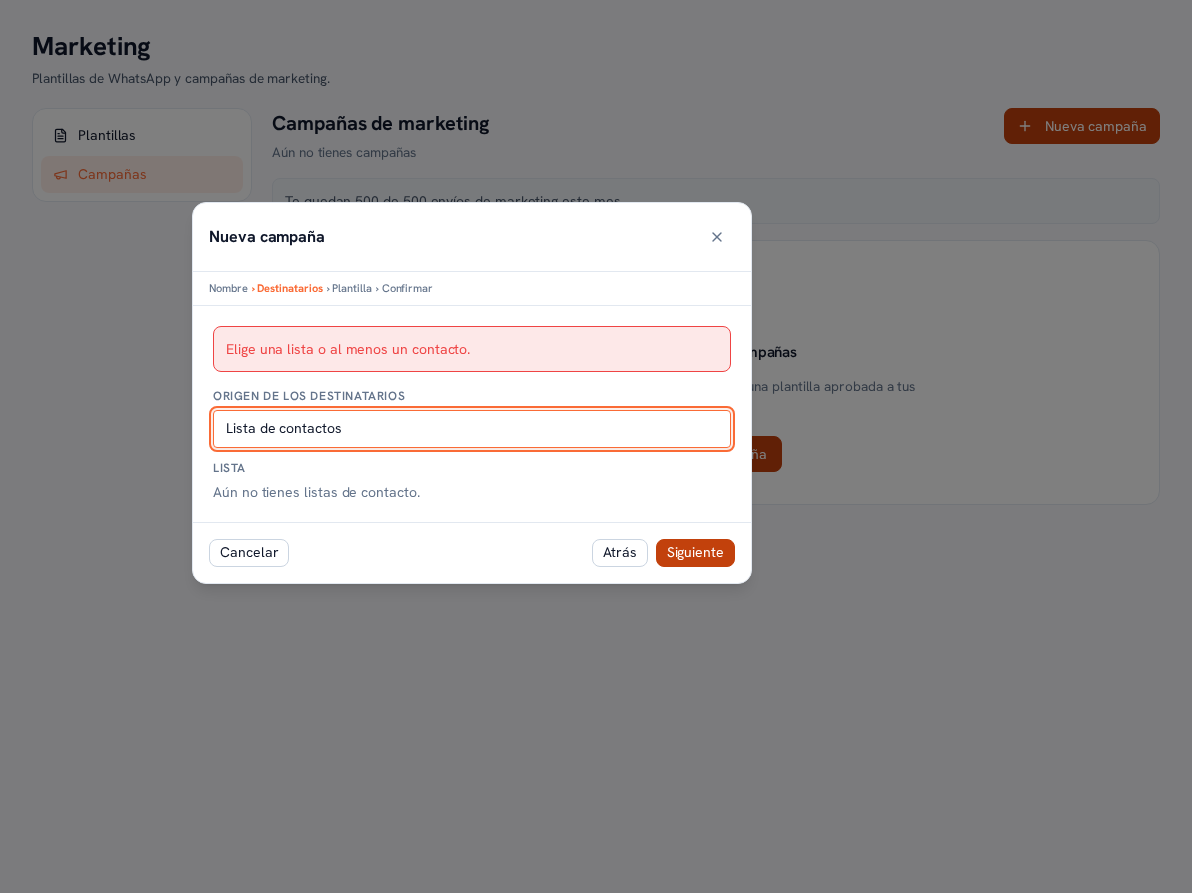
- Tap “New campaign”, on Marketing → Campaigns. The “New campaign” window opens with a breadcrumb of steps: Name › Recipients › Template › Confirm — today’s wizard doesn’t have a separate step for choosing which contact field each template variable corresponds to.
- Name: type the campaign’s name (for example “August news”) and tap Next.
- Recipients: choose the recipients’ source — an already-created contact list (section 7), or a manual selection of specific contacts. If you tap Next without choosing any list or any contact, the wizard stops you with the notice “Choose a list or at least one contact” (or use Back to go to the previous step).
- Template: choose among your Approved templates; the window shows you a preview of the body,
with its
{{n}}variables exactly as you wrote them when creating it (section 9) — they’re filled in with the contact’s real data at send time. Tap Next. - Confirm: a summary with the campaign’s name, the chosen template, the eligible recipients, how many are excluded for being unsubscribed from marketing, and your plan’s remaining usage. Tap “Create and send” to launch it (or Back to review a step).
Result: the campaign is created and the send starts immediately; it shows up in the Campaigns table (section 12) with its status and its live results.