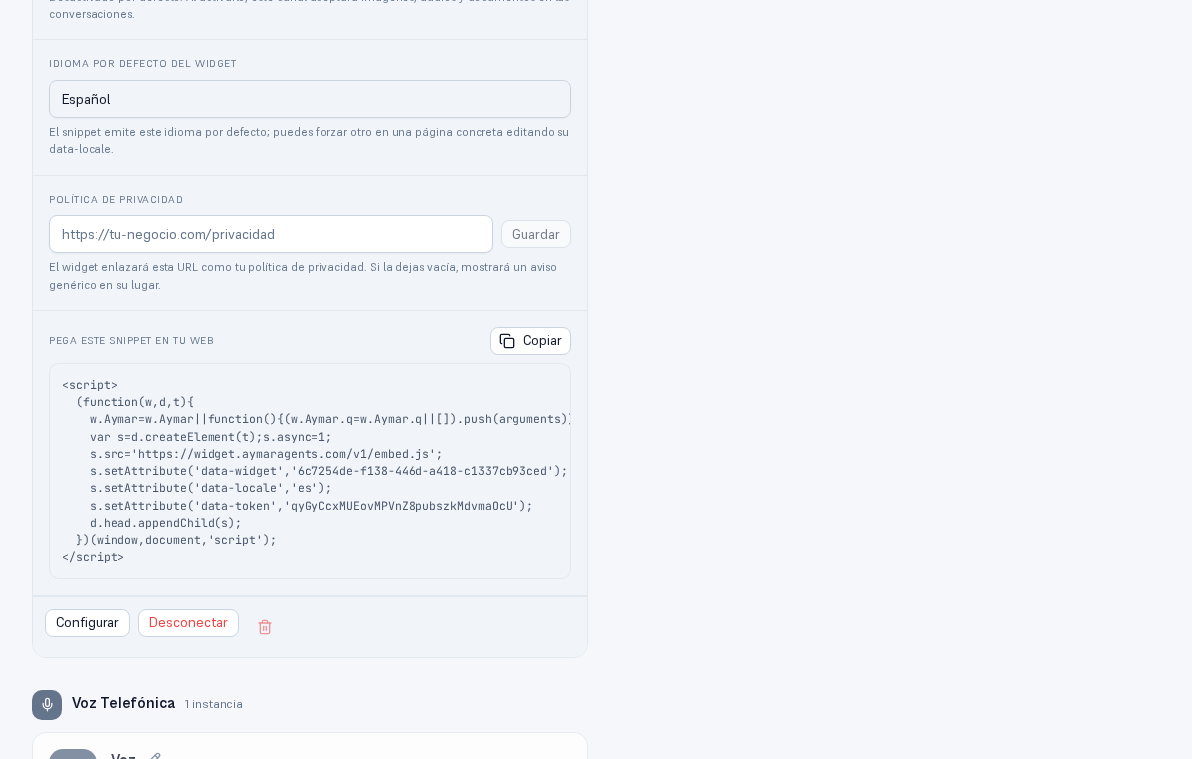
The snippet is copied from the platform itself, in Channels → Web Widget. Each agency has its own snippet, with a unique identifier already included — there’s nothing to write or edit, just copy and paste the whole block.
The block looks like this (the data-widget and data-token values come already filled in, identifying
your agency and this specific Web Widget instance):
<script> (function(w,d,t){ w.Widget=w.Widget||function(){(w.Widget.q=w.Widget.q||[]).push(arguments)}; var s=d.createElement(t);s.async=1; s.src='https://widget.example.com/v1/embed.js'; s.setAttribute('data-widget','xxxxxxxx-xxxx-xxxx-xxxx-xxxxxxxxxxxx'); s.setAttribute('data-locale','es'); s.setAttribute('data-token','xxxxxxxxxxxxxxxxxxxxxxxxxxxxxxxx'); d.head.appendChild(s); })(window,document,'script');</script>Note — The script’s domain (
s.src) doesn’t change with your provider’s brandUnlike the rest of the interface, the small script that loads the widget is always served from the platform provider’s infrastructure, exactly as it appears in the snippet you copy — it isn’t customized per white-label brand in this version of the product. You can see that domain in your site’s source code if you inspect the
<script>tag; it doesn’t affect what your visitor sees, since their browser never reaches that address directly.
data-widgetidentifies your agency. Don’t share it between different customers’ sites, and don’t copy it by hand: always use the “Copy” button so you don’t accidentally cut the value short.data-localesets the chat interface’s language. The snippet you copy always comes with the default language you chose for that instance already written in, from Channels → (your Web Widget) → Widget’s default language (administrator manual, “Channels” chapter) — you don’t normally need to edit it by hand.data-tokenidentifies this specific instance of Web Widget. It only matters if you have more than one Web Widget-type channel on your account (for example, a different site per brand or per language): each instance has its own snippet with its owndata-token, so always copy the snippet for the right instance from its own card in Channels — never mix one instance’sdata-tokenwith another’sdata-widget.
Note — Supported languages and what happens if you request another one
The supported values are
es(Spanish),en(English) andit(Italian). Ifdata-localearrives with any other value, is empty, or doesn’t arrive at all, the widget shows in English — it never fails or stops loading because of an unrecognized language.
Warning — Forcing a different language on a specific page
If your site is multilingual (for example, you have an English version at
/en/), you can override the default language only on that page: edit the value ofs.setAttribute('data-locale', …)by hand in the snippet pasted on that specific page, without touching the rest of the values. The rest of your site keeps using the default language configured in Channels.
Note — Optional attribute:
data-apiOnly applies if your installation uses its own backend, different from the platform’s shared one. It’s added like this:
s.setAttribute('data-api','https://api.yourdomain.com/api/v1');. In the normal case you don’t need to touch this attribute — the widget uses the platform’s backend by default.
Where to paste it: before </head> or before </body>
Section titled “Where to paste it: before </head> or before </body>”The snippet is standard HTML and works the same in both places: right before the closing </head>, or
right before the closing </body>. Since the script loads asynchronously, the exact position doesn’t affect
your site’s speed. Use whichever slot your template or platform offers you; many content managers only let
you touch one of the two.
It must appear exactly once, in a template or layout shared by every page (a global footer or header) — don’t paste it page by page.
Warning — Quick path (3 steps)
- Copy the snippet from Channels → Web Widget. 2) Paste it before
</head>or</body>in your site’s global template. That alone makes the widget work. 3) Optional (recommended): restrict which sites it can load on by adding your domain in Settings → Widget customization → Allowed domains (chapter 4).