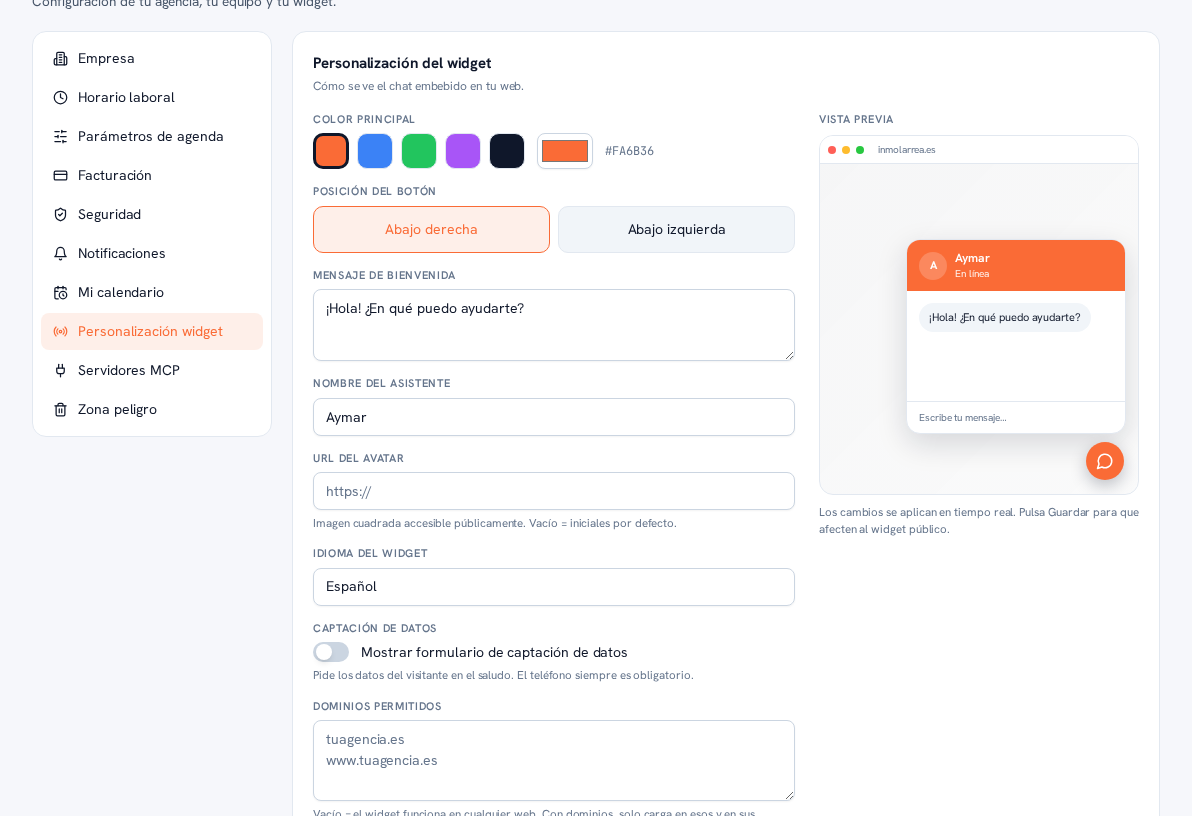
How the chat embedded on your site looks. It’s a setting shared across all your Web Widget instances — unlike the chat’s language, which is chosen per instance on the channel’s own card (Manual 24 · Channels, section 6.1), not here.
Requirements: Admin role.
- Go into Settings → Widget customization.
- Choose the primary color: one of the presets, or a custom color with its hex code.
- Choose the button position: “Bottom right” or “Bottom left”.
- Type the welcome message, the assistant name and, optionally, the avatar URL.
- Check the live preview, on the right, as you adjust the values.
- Tap Save to apply the changes to the public widget.
Result: all of your Web Widget instances instantly adopt the new look.
Allowed domains — which sites the widget can load on — are configured on this same screen: one domain
per line, without https:// or a path (for example, youragency.com also covers its subdomains). With an
empty list, the widget works on any site. The detail of how to copy each instance’s snippet and paste it
into your site is in Manual 24 · Channels; how it’s technically embedded in different content managers
and how to solve the most common problems is in Manual 06 · Web widget.
Within this same section is Data capture: turns on a small form on the widget’s greeting to ask the visitor for their details before chatting. Phone is always required; you choose the rest of the fields. Tap Save to apply the change to the public widget.
Note — The avatar is also provided via URL
Just like your agency’s logo (section 2), the widget’s avatar is provided as the URL of an already published and publicly accessible square image — if you leave it empty, default initials are shown. Direct file upload isn’t available yet.